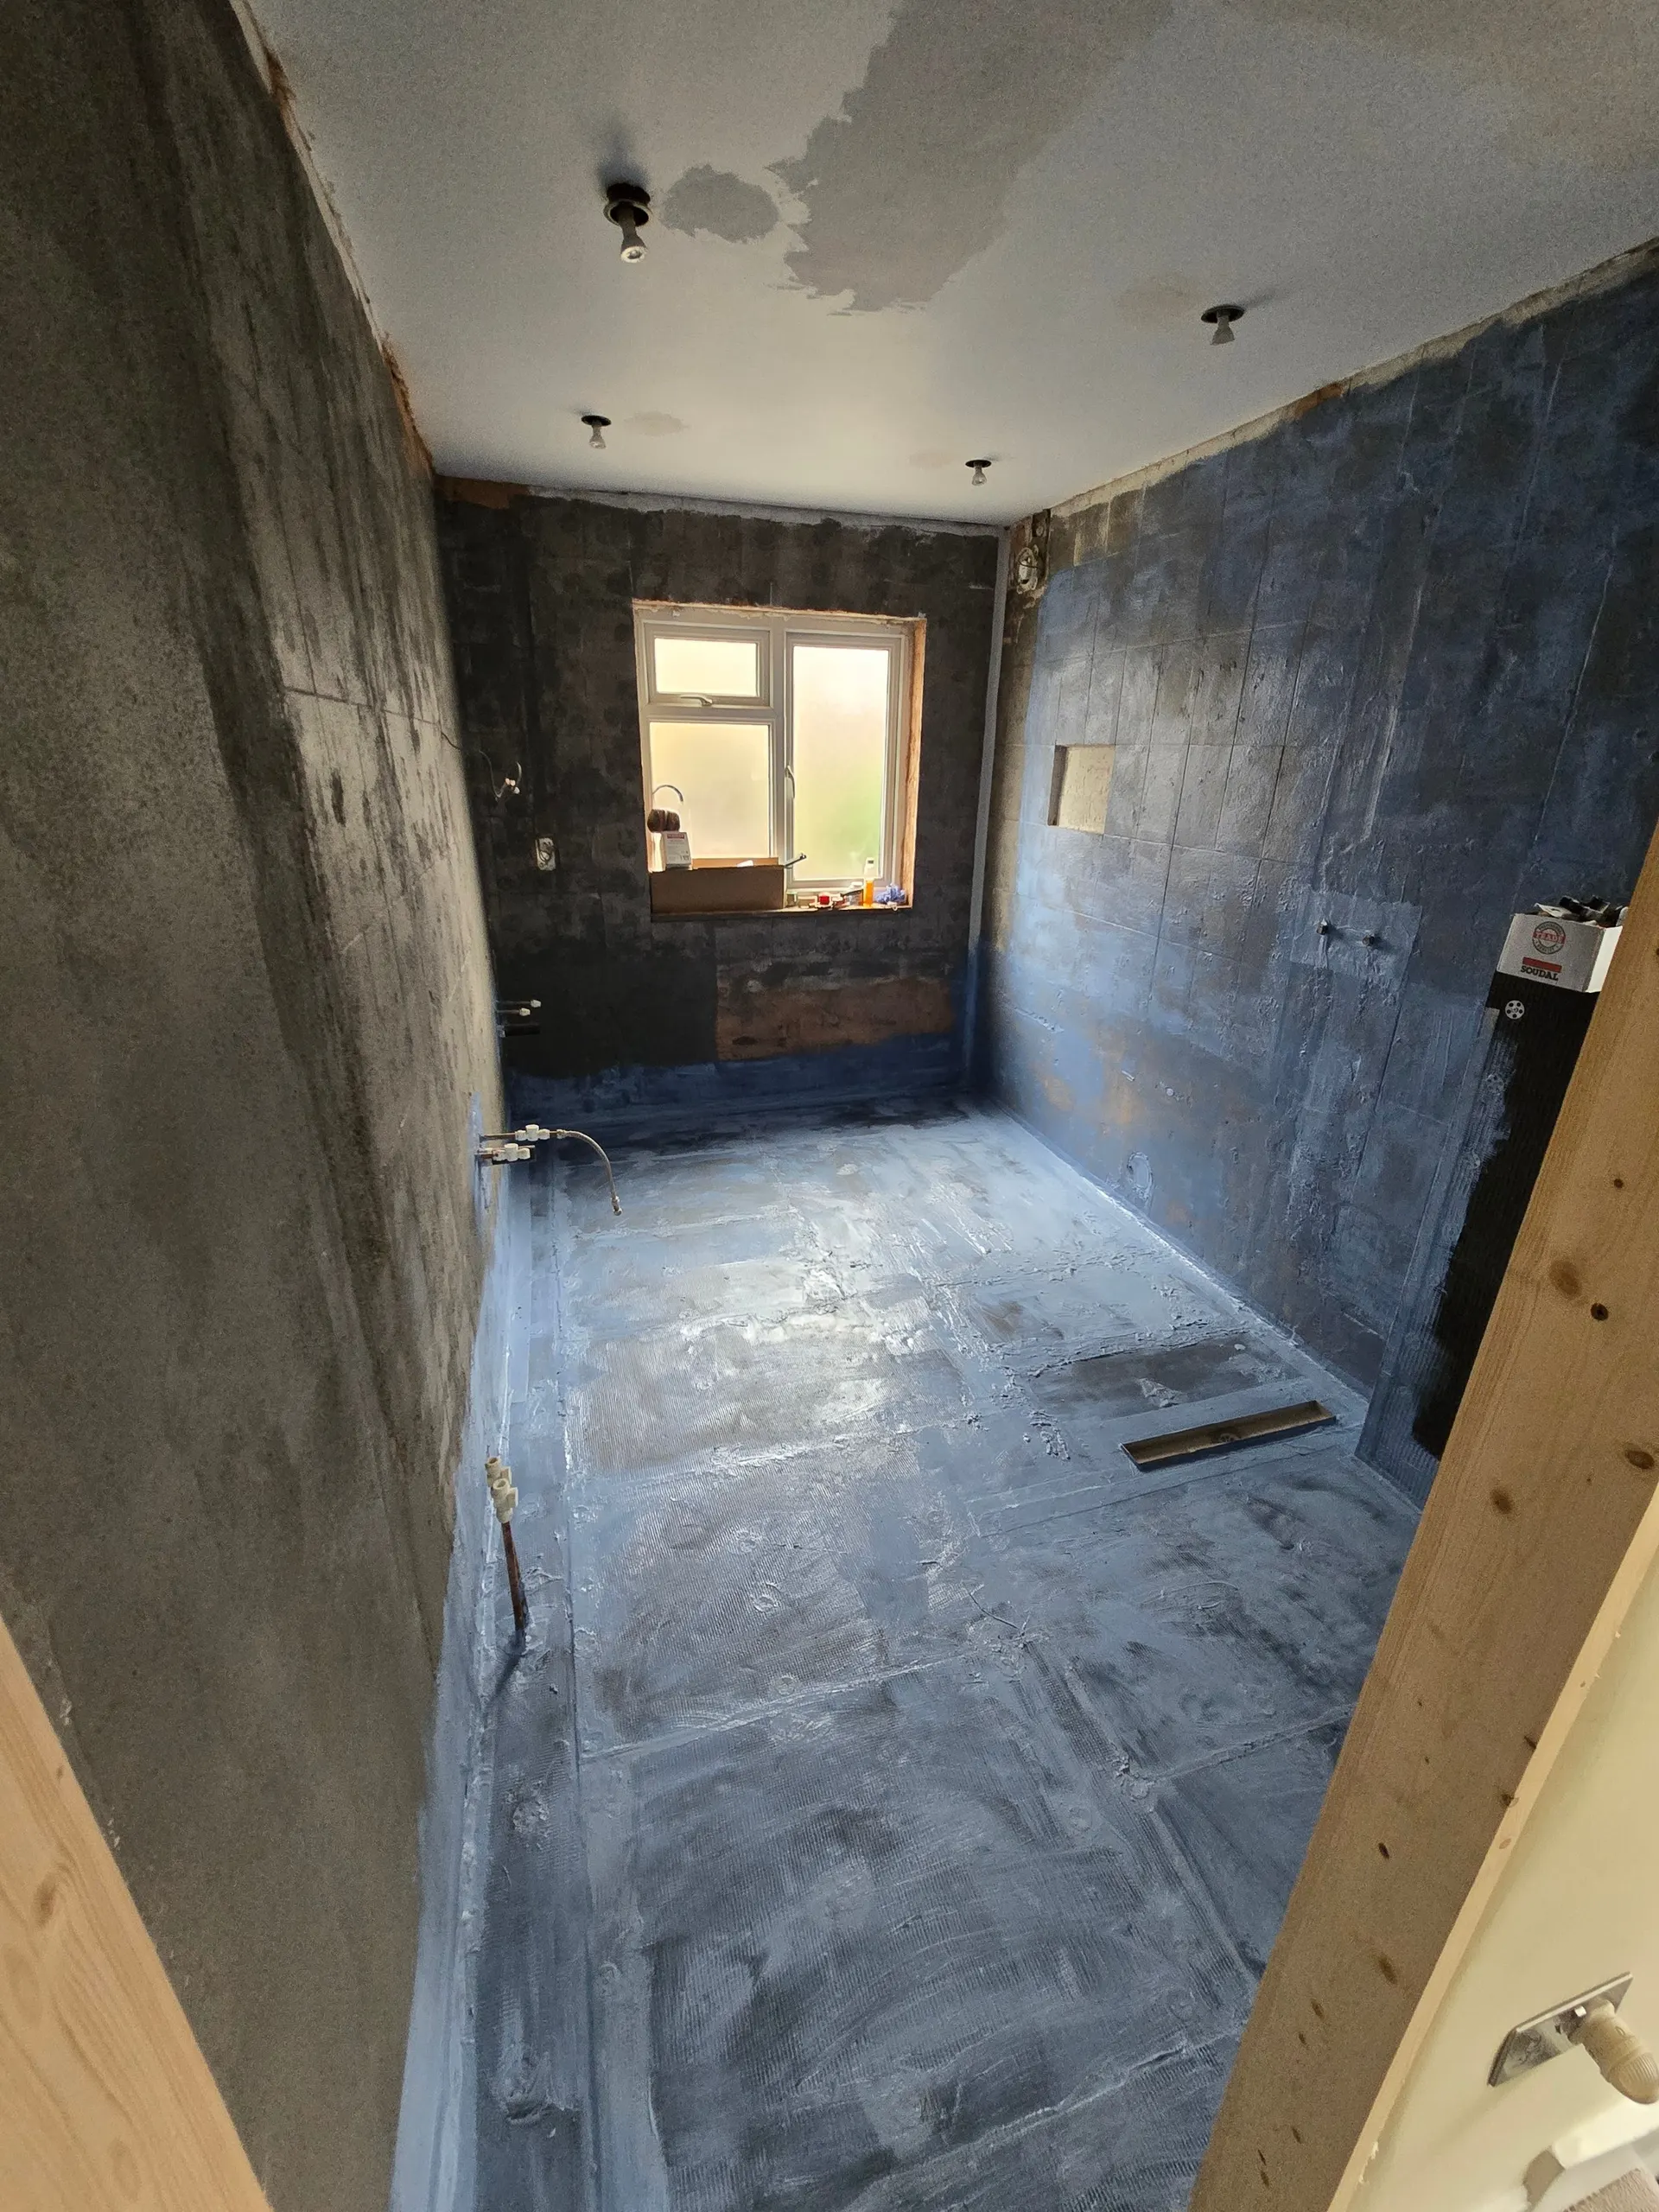
If you're tiling a shower or wet-room area, waterproofing — often called tanking — needs to happen before a single tile goes up, not after. Tiles and grout are not fully waterproof on their own; water gets through hairline gaps over time, and without a proper waterproof membrane behind the tiles, that water reaches the wall structure, timber, or plasterboard underneath, where it can cause rot, mould and hidden damage long before any problem becomes visible on the surface.
What tanking actually involves
Tanking typically means applying a waterproof membrane — either a liquid membrane painted on in coats, or a sheet membrane bonded to the wall and floor — across the entire wet area: shower walls up to at least splash height (often the full height in an enclosed shower), the shower floor or tray upstand, and critically, every internal corner and junction where water is most likely to find a way through. Corners, the join between wall and floor, and any pipe penetrations (shower mixer, waste) need extra reinforcement, usually with a waterproofing tape or fillet, since these are the weak points where most tanking failures actually occur.
Typical process
A typical tanking job involves: preparing the substrate (removing old tiles or loose material, making sure the surface is sound, clean and free of dust), priming if the product requires it, applying the membrane in at least two coats (liquid systems) or bonding sheet membrane with the correct adhesive, reinforcing corners and joints with tape, and allowing full curing time before tiling begins — often 24-48 hours depending on the product and ambient temperature. Skipping the cure time and tiling too early is a common mistake that can compromise the whole system.
Do you always need to tank the whole wall?
Not necessarily — for a standard bath with a shower over it, waterproofing the immediate splash zone (typically up to around 1.8-2m on the shower wall and lower on adjacent walls) is usually sufficient rather than tanking floor-to-ceiling throughout the whole room. For a fully enclosed walk-in shower or wet room, however, waterproofing needs to extend across the whole floor and up the walls of the enclosed area, since water exposure is far more constant and widespread. A competent tiler or bathroom fitter will assess this based on your specific layout.
What happens if it's skipped or done badly
The consequences of poor or missing waterproofing rarely show up immediately, which is exactly what makes it so risky — problems often surface months or years later as damp patches on the other side of a wall, a soft or spongy feeling floor, mould growth, or in serious cases, structural timber rot that requires far more invasive (and expensive) repair than the waterproofing itself would ever have cost. This is one area of a bathroom renovation where cutting corners genuinely isn't worth the saving.
Cost of professional tanking
As part of a wider bathroom renovation, waterproofing/tanking is usually included in the tiler's or bathroom fitter's overall quote rather than priced as a stand-alone line item, but as a rough steer, expect it to add a meaningful amount to labour time for a shower enclosure — the materials themselves are relatively inexpensive, but proper application (especially around corners and pipework) is time-consuming and needs to be done correctly. For a sense of overall bathroom tiling costs, see our UK tiling cost guide.
DIY or professional?
Waterproofing is one of the few parts of a tiling job where getting it wrong is genuinely expensive to fix later, since the tiles have to come off again to correct it. A confident, careful DIYer can apply a liquid tanking system correctly if they follow the manufacturer's instructions closely, particularly around corners and joints — but if you're at all unsure, this is a sensible place to bring in a professional even if you're planning to tile the rest yourself. Once your waterproofing has cured, see our guide to tiling a wall yourself for the next steps, and check which tile adhesive is compatible with your specific membrane, since not all adhesives bond equally well to every waterproofing product.
Signs of a waterproofing failure in an older bathroom
If you're retiling an older bathroom rather than starting from scratch, it's worth checking for signs the original waterproofing (if any was even fitted, since older properties may have none at all) has already failed before you tile straight over the top. Look for: soft or discoloured plasterboard visible once old tiles are removed, a musty smell around the shower area, discolouration on a ceiling or wall in the room below a first-floor bathroom, or grout and sealant that was already visibly failing before removal. Any of these signs mean the substrate needs proper investigation and likely replacement, not just fresh waterproofing over a compromised base.
Products commonly used for tanking
Common product types include brush- or roller-applied liquid membranes (often a two-part or single-part flexible compound), waterproof tanking tape for reinforcing corners and joints, and pre-formed waterproof corner and pipe collar pieces that fit around fixtures neatly. Most reputable tile and building merchants sell recognised tanking systems as a kit, which is generally more reliable for a DIY project than assembling compatible products from different brands, since a full kit is tested to work together as a system.
Frequently asked questions
Related articles
How to Tile a Wall Yourself: Step-by-Step for Beginners
A practical, step-by-step guide to tiling a wall yourself, from planning your layout to grouting, with the mistakes that trip up most first-time tilers.
Tile Adhesive Types Explained: Which One for Which Surface
The main types of tile adhesive, what surfaces and tile types each one suits, and how to pick the right one for your project.
How Much Does Tiling Cost in the UK? Walls, Floors and Bathrooms
Tiling cost depends on far more than the tiles themselves — prep, waterproofing, tile type, and layout complexity all move the price. Here's a realistic UK breakdown.
Planning a bathroom retile?
Carvalho Renovations can handle waterproofing and tiling together as part of a bathroom renovation, so it's done right the first time.
Get a Free Quote